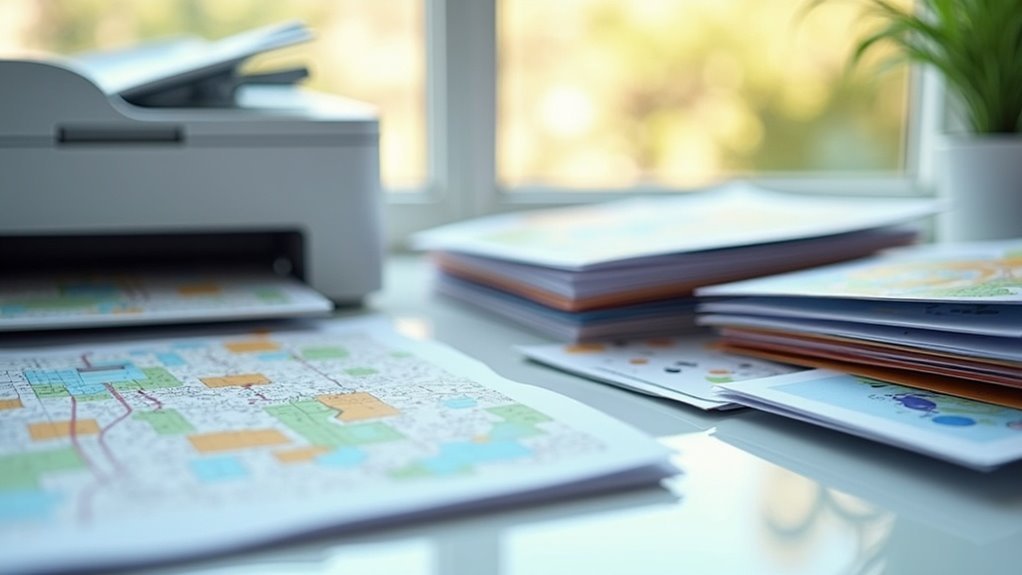
To print critical maps and contacts for survival and preparedness, begin by accessing Google Maps to search for your essential locations, such as emergency routes and nearby resources. Customize your map settings to highlight key features, then select “Print map” for a preview. Adjust margins and scale to ensure clarity, making them easy to read in high-stress situations. For your contacts, log into Google Contacts, categorize them by importance, and export them as needed for quick access. Ensure you’re using at least 300 DPI and select the appropriate paper size for maximum visibility. Explore additional strategies to bolster your emergency preparedness planning.
Key Takeaways
- Access Google Maps, search for your location, and select “Print map” to create hard copies of critical maps essential for survival scenarios.
- Customize print settings by adjusting margins, scale, and resolution to guarantee clarity and detail, which are crucial for navigating in emergency situations.
- Utilize the “Labels” feature in Google Contacts to effectively organize and easily export vital contact information, ensuring you have access to key resources when needed.
- Regularly back up both maps and contacts to secure cloud services or external drives, providing easy retrieval during emergencies or when away from home.
- For enhanced preparedness, ensure high-resolution maps are printed in CMYK color space to achieve accurate color reproduction, which can be vital for identifying routes and landmarks in crisis situations.
Accessing Google Maps for Printing
When you need to print a map for your survival plans, accessing Google Maps is straightforward.
Just go to maps.google.com, search for your desired location, and click the three vertical dots icon in the top-left corner. Select “Print map” to open the print preview window. Here, you can adjust settings like paper size, orientation, and margins to ensure your map is optimized for your survival kit.
For a quicker method, use Ctrl + P to bring up the print dialog immediately.
If you want to save the map as a PDF for easy access during emergencies, navigate to My Maps on a PC and choose the “Print” option to do so.
Customizing Map Settings for Print
To ensure your printed maps are effective for survival and prepping scenarios, it’s crucial to customize the settings appropriately.
Begin the printing process by setting the resolution to at least 300 DPI to capture detailed features essential for navigation. Opt for the CMYK color space to ensure vibrant and accurate color reproduction; RGB may not provide the necessary contrast in printed maps.
Set your resolution to 300 DPI and use CMYK for vibrant, accurate color in your printed maps.
Specify the paper size and orientation, with tabloid (11 x 17 inches) recommended for enhanced visibility during emergencies. Export your maps as PDF files to preserve quality and scalability for various uses.
Remember to account for bleed areas by extending your design 0.125 inches beyond the trim size, and maintain a safe zone of 0.25 inches for critical elements like landmarks and routes.
Generating a List of Contacts in Google Contacts
Generating a list of contacts for your survival and prepping network in Google Contacts is an essential step for staying organized and connected with like-minded individuals.
Begin by logging into your Google account and navigating to contacts.google.com. Utilize the “Labels” feature to categorize contacts based on skills, resources, or locations, making it easier to manage your preparedness community.
If you need to print vital information, select the relevant contacts or labels, click on “More,” and choose “Export” to save them in your preferred format. Remember to use the search bar for quick access to specific contacts, especially during emergencies.
Regularly sync your Google Contacts with your mobile device to ensure you have up-to-date access to your survival network wherever your prepping adventures take you.
Adjusting Margins and Scale for Optimal Fit
When you’re preparing to print your survival map, setting appropriate margins is crucial to ensure that no vital information is cut off.
You’ll also need to determine the right scale factor so that the entire map fits on your chosen paper size without sacrificing clarity.
Lastly, always check the print alignment in the preview to confirm that all critical details are visible and correctly positioned before proceeding to print.
Setting Appropriate Margins
Setting appropriate margins is essential for ensuring that crucial information on your survival and prepping materials isn’t cut off during printing.
Here are some key tips to consider:
- Set margins of at least 0.25 inches inside the trim area to accommodate important survival details.
- Adjust margins for a clean, professional appearance, avoiding any distracting white edges.
- Ensure margins are proportional to your document size for optimal clarity and readability.
- Test different margin settings in print preview mode to achieve the best visibility for your prepping resources.
Determining Scale Factor
To ensure your survival maps are accurately displayed, it’s crucial to determine the appropriate scale factor along with your margin settings.
Target a scale range of 1:24,000 to 1:200,000 based on the level of detail needed for your specific survival scenarios. Adjust your print settings to fit the map within your selected paper size while keeping essential features clear and legible.
A 0.125-inch bleed area is critical to avoid losing vital information during trimming. Utilizing tools like Caltopo can assist you in selecting specific layers and adjusting margins and scales for high-quality prints.
Testing your maps on standard sizes, such as 11 x 17 inches, can help optimize your results for practical use in the field.
Ensuring Print Alignment
Ensuring print alignment is vital for creating maps that effectively convey crucial survival and prepping information.
Adjusting margins and scale should be a primary focus. Follow these steps:
- Set margins to 0.25 inches to ensure that critical survival elements aren’t cut off during printing.
- Maintain a scale that fits your paper size while preserving essential details, ideally at 300-600 DPI to guarantee clarity in your maps.
- Use the print preview feature to check alignment before finalizing your print job.
- Confirm printer settings for full-page printing to avoid missing key portions of your survival maps.
Selecting Paper Size and Orientation
When preparing to print your survival maps, selecting the right paper size is crucial for effective navigation in the field.
For detailed maps that outline essential survival routes or resources, consider using Tabloid (11 x 17 inches) or even larger formats to ensure clarity and visibility.
Additionally, pay attention to the orientation; aligning your map with the landscape can significantly improve your situational awareness and decision-making during critical moments.
Recommended Paper Dimensions
Selecting the right paper dimensions is essential for effectively printing maps used in survivalism and prepping, as it directly impacts visibility and usability during critical situations.
Here are some recommended paper dimensions for topographic maps that can aid in navigation and planning:
- Tabloid (11 x 17 inches): Best for detailed topography at a 1:24,000 scale, allowing for precise route planning and area assessment.
- Letter (8.5 x 11 inches): Suitable for smaller maps, but may require frequent navigation checks; ideal for quick reference guides or checklists.
- Large Format (24 x 36 inches): Perfect for showcasing intricate road networks, terrain features, and evacuation routes, providing a comprehensive overview of the area.
- Consider Bleed Areas: Extend designs 0.125 inches beyond the trim size to avoid white edges, ensuring that important information isn’t cut off during printing.
Choose wisely to enhance your map’s effectiveness in survival situations!
Optimal Map Orientation
For effective navigation in survival situations, map orientation is crucial for interpreting the terrain accurately.
To optimize your map usage, print essential maps on Tabloid-sized paper (11 x 17 inches). This larger size improves the visibility of critical topographic features at a 1:24,000 scale, making it easier to identify key landmarks and routes.
Always orient your map to align with the landscape; this practice aids in understanding spatial relationships intuitively, which is vital in survival scenarios.
Be cautious, as smaller maps (8.5 x 11 inches) can restrict your overall perspective, complicating navigation when time is of the essence.
Ensure that important topographic details are easily visible, particularly at the edges of the map, and consider keeping larger overview maps in a side pocket for collaborative planning with your group during expeditions.
Ensuring Clarity and Readability in Printed Maps
To ensure clarity and readability in printed maps, especially in the context of survivalism and prepping, it’s crucial to focus on several key factors that enhance their quality.
Here are four essential tips for creating a professional map:
- Prepare your map at a resolution of 300-600 DPI for maximum clarity and detail, ensuring that critical survival information is easily discernible.
- Use the CMYK color space for accurate color reproduction, which helps avoid dull appearances and allows for better visibility in various environments.
- Establish a safe zone of at least 0.25 inches to prevent cutting off critical information, ensuring that vital details are preserved during printing.
- Choose legible typography: opt for sans-serif fonts for digital maps and serif fonts for print, with sizes ranging from 10-20pt based on the format, to enhance readability in high-stress situations.
Troubleshooting Common Printing Issues
Many common printing issues can disrupt your efforts to create essential survival maps and contact lists. However, addressing these problems is often straightforward. Here are some tips to help you troubleshoot:
| Issue | Solution | Notes |
|---|---|---|
| Portions cut off | Check paper size and orientation | Adjust settings in print dialog |
| Color discrepancies | Verify color profiles and printer setup | Confirm calibration is correct |
| Map detail loss | Adjust scale settings | Fit the map without losing clarity |
| Margins too wide | Set margins to zero | Especially important when printing survival maps |
Implement these solutions for smoother printing experiences, ensuring your prepper resources are always ready!
Saving Maps and Contacts for Future Use
Printing maps and contact lists is just the beginning; saving them for future use is crucial for survival preparedness. Here’s how you can do it effectively:
- Access Google Maps, select your survival location, and choose “Print map” for a hardcopy version that can guide you in emergencies.
- Use My Maps to create a customized survival map, marking essential resources, and utilize the “Save as PDF” option for offline access in case of power outages.
- Save important contacts, such as emergency services and family members, in your smartphone or address book, including names and phone numbers for quick access during a crisis.
- Regularly back up your digital maps and contacts to a secure cloud service or external drive to ensure they’re retrievable when you need them most.