To make a micro hydro generator for your survivalist needs, start by gathering essential materials like enameled magnet wire, spray paint lids for the turbine, and diodes for the circuit. Construct the turbine by inserting skewers into the lids, ensuring they are balanced for optimal performance. Wire a diode bridge to convert AC to DC, and incorporate a resistor and capacitor for stabilization. Once assembled, test your setup in flowing water to confirm its functionality and monitor the output. This generator can be a valuable asset in a prepping scenario, providing electricity for essential devices. Additionally, explore ways to maximize its efficiency and consider various applications to enhance your self-sufficiency in a survival situation.
Key Takeaways
- Gather essential materials such as enameled magnet wire, spray paint lids, diodes, resistors, and capacitors to construct a reliable micro hydro generator for off-grid energy solutions.
- Build a balanced turbine using spray paint lids and skewers, ensuring proper alignment to effectively harness flowing water, which is crucial for survival situations when traditional power sources are unavailable.
- Create a diode bridge with diodes to convert the AC generated by the turbine into DC electricity, providing a stable and efficient power supply for your prepping needs.
- Test the generator’s functionality by placing the turbine in a reliable water source and connecting an LED to verify that it successfully generates power, an important skill for self-sufficiency.
- Monitor voltage and current using a multimeter to ensure the generator operates efficiently, making adjustments as needed to maximize output, which is vital for maintaining energy independence in emergencies.
Understanding Hydro-Electric Power Principles
To harness the power of flowing water effectively for survival and prepping, it’s important to grasp the principles of hydro-electric power generation. This renewable energy source can convert the kinetic energy of water into mechanical energy, and subsequently into electrical energy via turbines, which can be vital in a survival situation.
You can estimate the theoretical power output using the formula Pth = 62.4 Q x h, where Q represents the flow rate and h is the net head. However, keep in mind that efficiency losses can reduce actual output to 50-85% of theoretical values.
It’s also crucial to conduct environmental impact assessments to minimize effects on water quality and local ecosystems, ensuring compliance with regulations while optimizing energy production for your prepping needs.
Being able to generate your own electricity can be a game-changer in a crisis, enhancing your self-sufficiency and resilience.
Materials Needed for Your Micro Hydro Generator
Building a micro hydro generator can be an invaluable skill for survivalists and preppers, providing a renewable energy source in off-grid situations. To construct your generator, you’ll need specific materials that are both functional and easily accessible in a survival context.
First, enameled magnet wire is essential; opt for 24 gauge, and gather about 100 meters for winding the coils. For a robust base, consider using foamcore or heavyweight corrugated cardboard, sized approximately 22 cm by 30 cm.
You can repurpose five spray paint lids for the turbine structure, drilling two holes around the edges for skewer insertion, which will help create a simple yet effective turbine.
Additionally, you’ll need four diodes to form a diode bridge, along with a resistor and capacitor to build a smoothing RC circuit, which stabilizes the output voltage.
Collecting these materials ahead of time will ensure you’re prepared to generate your own power when needed, making your survival setup more self-sufficient.
Constructing the Turbine
To construct the turbine for your micro hydro generator, begin by gathering essential materials such as spray paint lids and skewers.
Follow the assembly steps meticulously to ensure that each component fits snugly and maintains balance, which is crucial for optimal functionality in a survival scenario.
Once assembled, it’s vital to test the turbine to confirm it operates efficiently, as reliable power generation can be critical in prepping and survival situations.
Materials Needed for Turbine
Creating a functional micro hydro generator turbine is an essential skill for survivalists and preppers, as it harnesses the power of flowing water for energy. To construct an efficient turbine, gather the following materials: five spray paint lids, each with two holes drilled 2 cm from the rim for the skewers. Use skewers that are 8 cm long from the point to the lid to form the blades.
To ensure optimal performance, mark the cork center with five lines at 72-degree angles, making certain to evenly space the skewers for ideal water flow. Insert the skewers into the cork along these lines to create a balanced structure that can withstand the rigors of outdoor use.
Finally, cut a hole in the cork for the motor shaft to guarantee proper rotation, allowing you to generate electricity for your survival needs. This micro hydro generator can be a vital asset in off-grid living, providing a renewable energy source when traditional power is unavailable.
Assembly Steps and Techniques
Assemble your survival turbine by first positioning five spray paint lids in a circular arrangement, ensuring that each lid has two holes drilled 2 cm from the rim for skewer insertion.
Insert skewers through the drilled holes, maintaining an 8 cm distance from the skewer point to the lid to optimize the effectiveness of your turbine blades.
Mark the center of a cork and draw five evenly spaced lines at 72-degree angles for skewer placement, ensuring that your design is efficient and functional for survival needs.
Push the skewers into the cork along these lines to secure the blades firmly in place.
Finally, create a snug hole in the cork for the motor shaft, ensuring a secure fit for rotation, which is crucial for harnessing energy in emergency situations.
Testing Turbine Functionality
Once your turbine is fully assembled, it’s time to test its functionality to ensure it operates efficiently, especially in a survival situation.
Position your turbine in a flowing water source, making sure the blades are submerged to catch the current. Connect the LED to the output terminals; if it lights up, your turbine is successfully generating power, which can be crucial for emergency preparedness.
Monitor the rotation speed to verify it’s optimal; adjust the angle or position as needed to maximize efficiency. If the LED doesn’t light, check for obstructions or loose connections that could hinder performance.
Confirm the snug fit of the stepper motor shaft for smooth operation. This testing process is essential to confirm that your micro hydro generator is functioning as intended, providing a reliable power source in times of need.
Assembling the Generator
To successfully build your micro hydro generator for survival and prepping needs, start by constructing a turbine from five spray paint lids, which can be easily sourced from your supplies.
Drill two holes in each lid, 2 cm from the rim, and insert skewers to create blades, ensuring they’re spaced evenly at 72-degree angles for optimal efficiency.
Next, securely attach a stepper motor into the cork base; make sure the motor shaft is accessible for the turbine’s rotation, allowing for effective energy generation.
Utilize a diode bridge made from four diodes to convert the stepper motor’s alternating current into direct current, essential for powering your devices.
Finally, incorporate a resistor and capacitor in series with the diode bridge to stabilize the output.
Test your setup by directing water flow onto the turbine, ensuring it operates efficiently, providing a reliable power source in times of need.
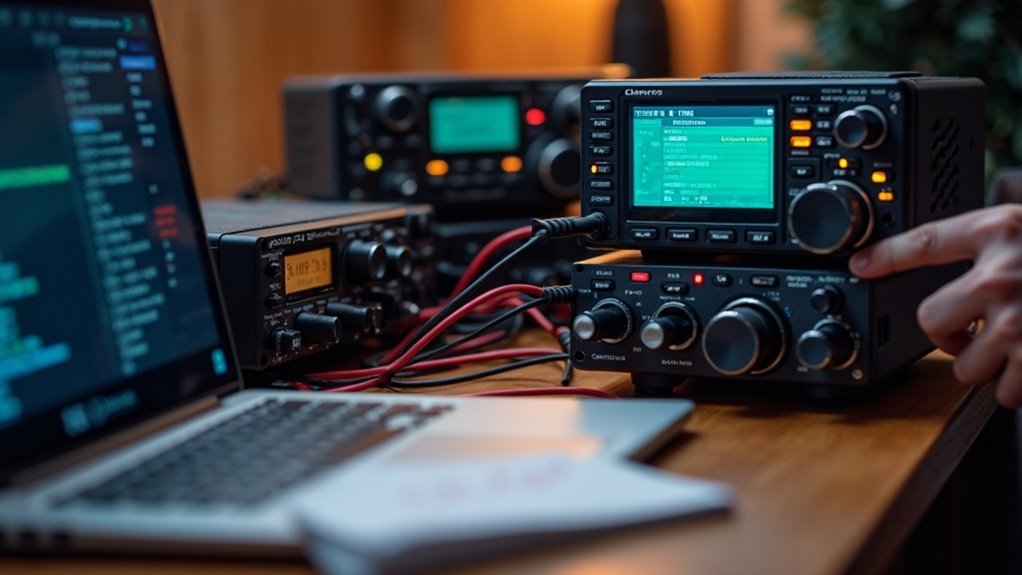
Wiring the Circuit
To wire the circuit for your survivalist needs, begin by constructing a diode bridge using four diodes, ensuring they’re oriented correctly to convert the AC power generated by your stepper motor into usable DC. This is crucial for reliable energy in emergency situations.
Next, connect a resistor and capacitor in series with the diode bridge to create an RC circuit, which will help smooth out the output signal and ensure stable power for your survival devices.
Once everything is connected, test the setup by attaching an LED to the circuit to confirm proper functionality, ensuring your system is ready for any unforeseen circumstances.
Diode Bridge Setup
As you prepare your micro hydro generator for off-grid living, setting up the diode bridge correctly is crucial for ensuring reliable energy generation.
Arrange four diodes in a bridge configuration, ensuring each diode allows current to flow in one direction during both halves of the AC cycle. Connect the positive terminal of your stepper motor to one pair of diodes and the negative terminal to the other pair.
Select robust diodes like the 1N4001, capable of handling 1A and 50V. Proper alignment is vital for efficient rectification, converting AC to DC, which is essential for powering your survival equipment.
This setup is foundational for maintaining peak performance and stability in your renewable energy system.
Capacitor and Resistor Connection
With the diode bridge successfully set up, the next step involves wiring the capacitor and resistor to smooth the rectified output, which is essential for reliable power in survival situations.
Follow these instructions:
- Connect the diode bridge output to the positive terminal of the capacitor and the resistor in series, ensuring a stable power supply for your essential devices.
- Confirm the capacitor is rated for at least 10V to prevent damage, as reliable components are crucial in survival scenarios.
- Choose a resistor value between 100 ohms and 1k ohm, depending on the desired discharge rate, to manage power distribution effectively.
Remember to connect the capacitor’s positive lead to the diode output and the negative lead to ground.
Test your circuit with an LED; it should light up, confirming the capacitor’s functionality and readiness for use in your prepping and survival gear.
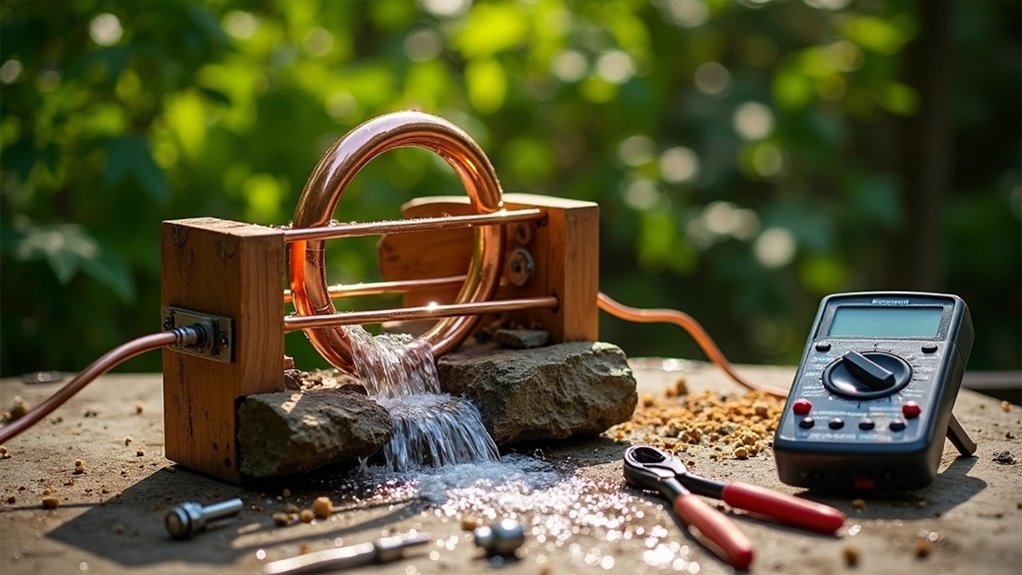
Testing Your Generator
Once you’ve set up your micro hydro generator for survival and prepping needs, it’s crucial to test its functionality to ensure reliable operation.
Start by connecting an LED to the positive and negative terminals; if it lights up, your generator is operational and ready for use in an emergency.
Next, use a multimeter to check the voltage and current, aiming for approximately 1.12V and 6.89A under ideal conditions to ensure it’s providing sufficient power for your survival equipment.
Confirm that your turbine is positioned in a consistent water flow source, such as a nearby stream or creek, for effective testing.
Verify the diode bridge‘s orientation to ensure proper AC to DC rectification, which is essential for powering your devices.
Conduct multiple tests with varying water flow to monitor any fluctuations in output voltage and current, as this can affect your preparedness strategy.
Practical Applications and Benefits
Testing your micro hydro generator is crucial for ensuring its functionality and reliability, but understanding its practical applications and benefits is essential for survivalism and prepping.
Here are three key advantages:
- Sustainable Energy: With the ability to generate up to 100 kilowatts, you can power your homestead or retreat using local water resources, providing an independent energy source in times of crisis.
- Minimal Environmental Impact: Operating on a run-of-river basis helps preserve aquatic ecosystems, allowing you to harness energy without disrupting the natural environment, which is vital in a survival scenario.
- Consistent Power Supply: With efficient conversion rates of 50% to 85%, you can rely on a steady electricity supply for critical needs like lighting and small appliances, reducing your dependence on fossil fuels and strengthening your self-sufficiency in emergencies.