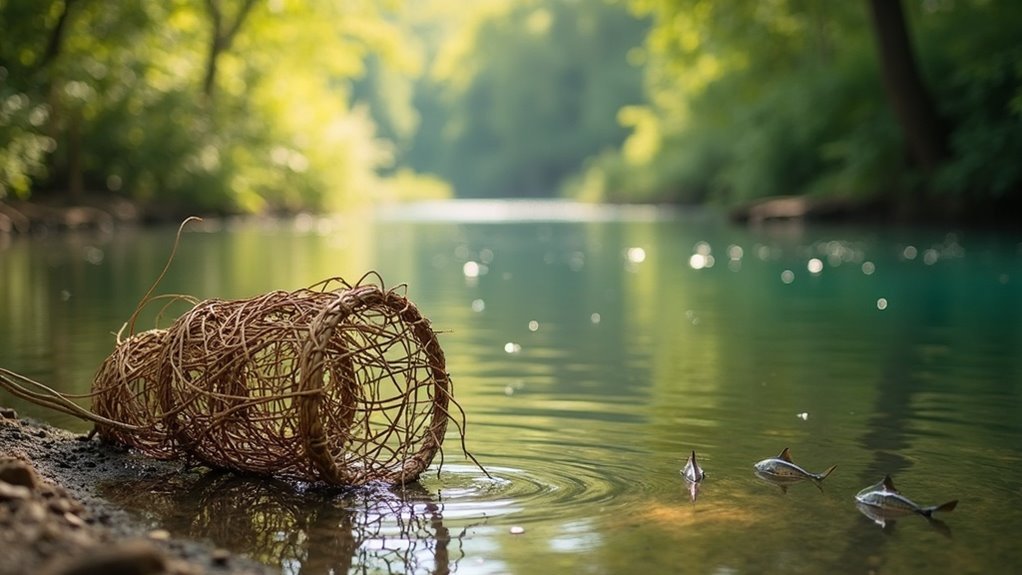
To create an effective fish basket trap for survival situations, begin by collecting five robust vines along with additional vine material for weaving. Position the frame in an asterisk shape and weave using an over/under technique until it reaches a height of about 8-10 inches. Next, fashion a cone-shaped cap from smaller vines, ensuring the opening is narrow enough to allow fish entry while preventing escape. Once your trap is assembled, add bait to attract fish and secure it with weights to keep it submerged. This method not only effectively captures fish but also serves as a valuable skill in your survival toolkit. You may also find extra tips on improving your trap’s efficiency for better results in your prepping endeavors.
Key Takeaways
- Gather sturdy vine, sticks, and essential tools for construction, ensuring all materials are ready for effective assembly in a survival situation.
- Weave the frame in an asterisk shape using an over/under pattern for enhanced durability, securing the center with scrap vine to withstand the elements.
- Construct a cone cap with a 4-inch diameter hole, ensuring it fits snugly on the trap body to facilitate efficient fish capture for sustenance.
- Create a wreath from additional vine to connect the cone and basket, while incorporating bait to attract fish, which is vital for your survival food supply.
- Weigh down the trap with heavy stones to prevent it from being swept away, and regularly monitor it for effectiveness to ensure a steady source of protein from captured fish.
Gather Your Materials
Gather Your Materials
To successfully build a fish basket trap, essential materials are required to ensure structural integrity and functionality, crucial in survival situations. Start by collecting five pieces of sturdy vine, each one inch thick and five feet long.
Additionally, gather approximately 50-60 feet of extra vine, ensuring it’s stripped of leaves and thorns for easier handling. If natural vines are scarce, flexible alternatives like rope can be utilized effectively.
Prepare five sticks, about 15 inches long, which will help maintain the trap’s structure and durability.
Lastly, equip yourself with essential tools such as a saw, gloves, and pruning shears to cut and shape your materials efficiently during the assembly process.
Being well-prepared with these items will enhance your chances of successfully trapping fish for sustenance in a survival scenario.
Weaving the Frame
Once you’ve laid out the five frame pieces in an asterisk shape, it’s crucial to secure the center with thin scrap vine to ensure stability during the weaving process. This step is vital for creating a durable structure that can withstand the rigors of survival situations.
Securing the center of your asterisk frame with vine is essential for a sturdy, survival-ready basket.
Follow these steps to guarantee a robust basket that may serve multiple purposes in your preparedness efforts:
- Strip all leaves and thorns from your vines to prevent obstructions, ensuring your basket is safe to use in various applications.
- Begin weaving the vines around the frame using an over/under pattern, which is essential for strength and resilience.
- Continue this technique until the basket reaches 8-10 inches from the ends, making sure the shape remains consistent throughout to maximize its functionality in your survival kit.
Completing the Weave
As you progress with the basket, securing the top ends is crucial for maintaining its shape, allowing for more effective weaving. Use an over/under pattern to create a sturdy foundation, weaving until about 1/4 to 1/3 of the height is completed. This stability is important for survival situations, where a reliable structure can serve multiple purposes. Once stable, untie the top ends for adjustments and tuck vine ends into previously woven areas to secure them, ensuring your basket can withstand the rigors of outdoor use. Continue weaving until you reach 8-10 inches from the ends of the frame, preparing for the next steps that may include reinforcing for added durability.
| Step | Action |
|---|---|
| 1 | Secure top ends |
| 2 | Weave in over/under pattern |
| 3 | Untie for adjustments |
| 4 | Tuck vine ends into basket |
Constructing the Cone Cap
With the basket structure stable and secure, the next step involves constructing the cone cap, an essential component for directing fish into the trap, a vital skill for survivalists and preppers.
Follow these steps for the best results:
- Stake ribs into the ground to create a cone shape, ensuring a 4-inch diameter hole at the bottom for fish entry. This design allows for efficient capture and minimizes escape.
- Match the upper opening to the trap body size, typically 20-24 inches in diameter, promoting easy access for fish while ensuring the structure remains robust.
- Weave smaller vines to keep the cone lightweight and manageable. Secure the top by lashing tightly and trimming any protruding ribs to enhance appearance and prevent snagging, which could compromise the trap’s effectiveness.
Final Assembly and Usage
Final assembly of your fish basket trap is crucial for enhancing its effectiveness in capturing fish, especially in survival situations.
Start by ensuring the cone shape is properly positioned at the top, directing fish into the basket through an appropriately sized opening. Use additional vine to create a wreath that fills the gap between the cone and the main basket, securing it tightly to withstand the rigors of nature.
Before submerging the trap, add bait inside—ideally contained in a bait cage for better attraction and to minimize waste. To prevent drifting in currents, weigh down or anchor the trap securely using heavy stones or other natural materials.
Lastly, regularly monitor your trap to evaluate its effectiveness and collect any captured fish, ensuring a reliable food source in your survival strategy.