To build a rigid heddle loom suitable for survivalism and prepping, start by gathering materials that are durable and readily available, such as wooden sticks, strong adhesive, and a handheld drill. Cut and prepare your components, ensuring you construct a sturdy frame that can withstand the elements. Assemble the loom by securely gluing the sticks together, creating a solid structure that can endure various conditions. Install the heddle and beams to ensure smooth operation during weaving. Once your loom is ready, you can begin creating textiles that may be useful for clothing, shelter, or other survival needs. If you’re interested in learning how to start weaving and what materials might be beneficial for your prepping endeavors, continue your research!
Key Takeaways
- Gather essential materials such as sturdy craft sticks, woodworking glue, and sandpaper to ensure a smooth finish for your loom construction.
- Cut four robust pieces of wood for the top and bottom frames, ensuring they are straight and free from warping, which is critical for durability in survival situations.
- Drill holes in at least 18 sticks to create a heddle, then securely glue them to a solid base to enhance stability and functionality.
- Assemble the loom frame by firmly gluing sticks along the edges and attaching drilled sticks at the corners to reinforce structural integrity, vital for long-term use.
- Install the heddle and beams, making sure they are positioned correctly for efficient operation, and double-check that all connections are tight to withstand the rigors of crafting in prepping scenarios.
Gathering Materials for Your Loom
Gathering the right materials is essential for building your rigid heddle loom, especially when preparing for self-sufficiency in survival situations.
First, gather wooden coffee stirrers or sturdy craft sticks, ensuring they’re straight and non-warped for the heddle, as these can be used for multiple purposes in a survival scenario.
You’ll also need woodworking PVA glue or impact adhesive to bond the parts securely, ensuring durability in your loom construction.
Fine sandpaper or wire wool is necessary for smoothing the wood surfaces, preventing any catching during weaving, which is crucial when resources are limited.
Don’t forget a drill with a fine drill bit to create drilled holes in the sticks, as having tools on hand can be vital for various tasks.
Finally, select a piece of wood about 24 mm wide for the loom’s frame assembly, which can also serve as a valuable resource for other projects in your prepping endeavors.
Cutting and Preparing the Components
To build your rigid heddle loom, you’ll need to cut and prepare your components with precision, ensuring you have the right tools for a reliable loom that can stand the test of time. Start by selecting straight, non-warped wooden sticks, ideally 24 mm wide, as these will be crucial for durability. Drill a hole in the center of at least 18 sticks for your heddle, which is essential for the weaving process. Cut four sturdy pieces of wood for the top and bottom frames, ensuring they are robust enough to withstand regular use.
Next, glue the undrilled sticks to two of the wide sticks to create a solid base. Use a right-angled card to guarantee corners are square, which is vital for structural integrity. Evenly space the remaining sticks to ensure a consistent weaving area. Finally, glue the wide pieces to sandwich the sticks together, placing a weight on top while the glue dries to secure a strong hold.
| Component | Quantity | Purpose |
|---|---|---|
| Wooden sticks | 18 | Heddle construction |
| Wide pieces | 4 | Frame top and bottom |
| Right-angled card | 1 | Guarantees square corners |
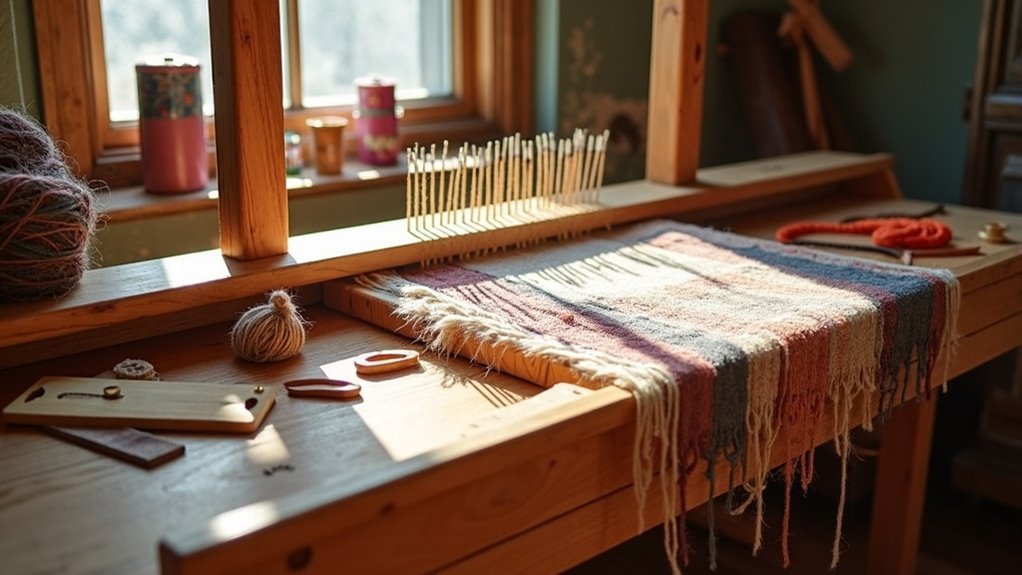
Assembling the Loom Frame
With your components cut and prepared, assembling the loom frame is the next vital step in creating your rigid heddle loom, which can be an essential tool for crafting textiles and clothing in survival situations.
Begin by gluing undrilled sticks along the long edges of two wide sticks, allowing the glue to dry completely to ensure durability. Next, attach one drilled stick at each end to form the corners, ensuring they’re square using a right-angled card for precision.
Evenly space the remaining sticks within the frame to maintain proper heddle functionality, utilizing a card as a spacer. Finally, glue the remaining wide pieces to the top and bottom to secure everything firmly, placing a weight on it to ensure the glue sets properly.
This sturdy loom frame will serve you well in creating essential fabrics for shelter, clothing, and other survival needs.
Installing the Heddle and Beams
Once you’ve gathered your materials for your loom, it’s essential to install the heddle and beams to ensure optimal weaving performance, much like preparing your resources for sustainable living.
Start by positioning the heddle correctly within the frame to guarantee smooth operation, similar to how you’d organize your supplies for efficiency. Secure the heddle block inside the frame by aligning it with the base slots and inserting bolts through the screw holes, ensuring that your setup is robust and reliable—just as you’d want your survival gear to be.
Position your heddle for smooth operation, securing it firmly—just like organizing your supplies for maximum efficiency.
Next, attach the beams using dowel screws through pilot holes, effectively connecting the warp and cloth beams for a secure structure.
For the apron rods, use Larks Head knots at the middle of the cloth beam to maintain even tension across the warp threads, akin to balancing your resources.
Finally, verify that all connections are tight and functional, ensuring your loom is as dependable as your preparedness plan.
Getting Started With Weaving
Now that your preparations and supplies are securely in place, it’s time to dive into the essential world of survivalism and prepping. Start with basic projects like building a bug-out bag or creating a food storage plan to boost your confidence and master fundamental techniques in self-sufficiency. Consider using pre-assembled kits, like a comprehensive emergency preparedness kit, to simplify your experience. Explore various supplies, such as freeze-dried foods, to appreciate how different options can enhance your readiness. For guidance, check out “The Prepper’s Blueprint” by Tess Pennington. Connect with online communities for tips and support.
| Project Type | Supply Option | Technique |
|---|---|---|
| Bug-Out Bag | Emergency Essentials Kit | Essential packing |
| Food Storage Plan | Freeze-Dried Foods | Inventory management |
| Emergency Shelter | Tarp and Rope | Shelter building techniques |